 Birch Bay
 Siding Installation Built for a Lummi Island Address
Lummi Island sits out in the marine air of Whatcom County, reached by a county ferry that connects it to the mainland near Birch Bay. That location is part of what makes the island beautiful, and it's also exactly why siding here fails faster than siding on an inland home just a few miles away. Salt-laden air, wind-driven rain coming straight off the water, and a moss season that can run most of the year all put steady stress on a home's exterior. A siding installation done for Lummi Island needs to account for all three from the first day of planning, not as an afterthought once problems show up.
This page focuses on one job in one place: installing new siding correctly on a Lummi Island home. We'll walk through what the local climate actually does to siding, what a correct installation involves, how our process works, and why a crew that already works this island brings real advantages over one that doesn't.
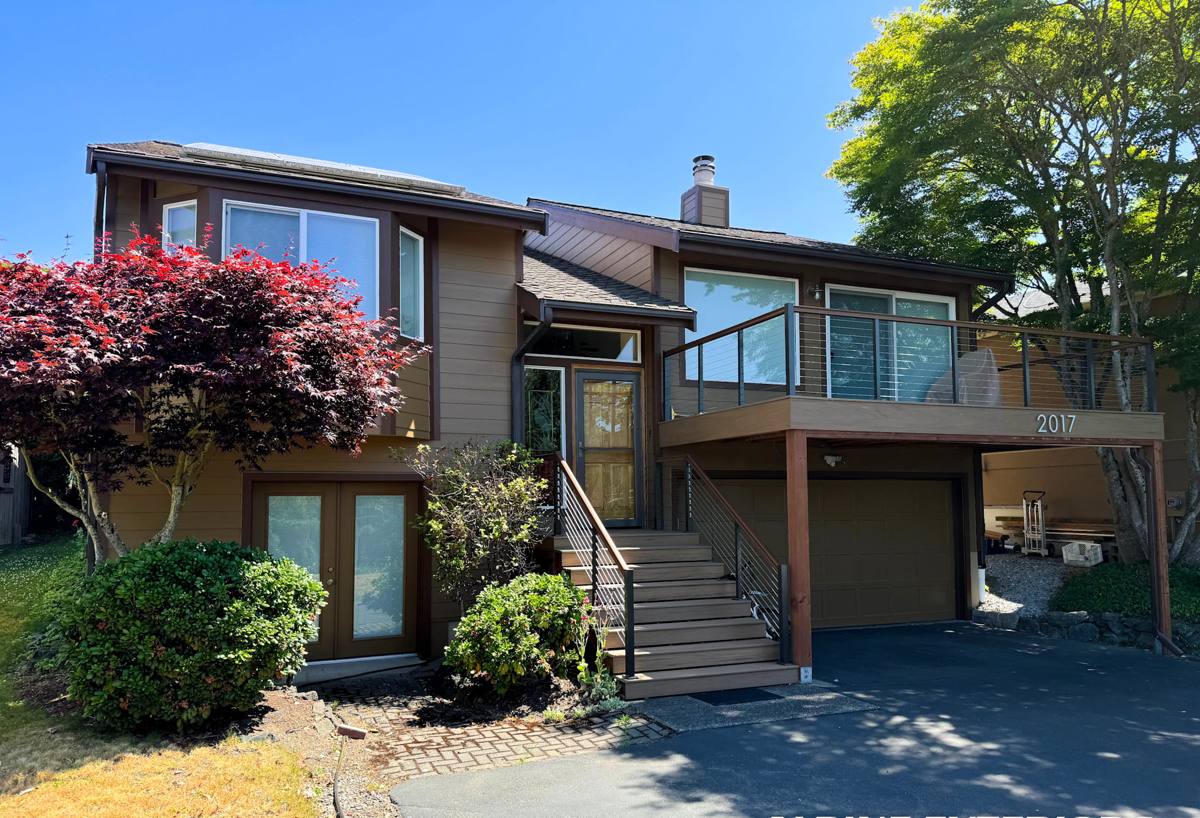
What Salt Air, Driving Rain, and Moss Actually Do to Siding
Salt Air and Corrosion
Airborne salt from the surrounding water settles on every exterior surface, including siding, fasteners, and trim. Over time it accelerates corrosion in metal components — nail heads, flashing, and hardware — and it can degrade paint and coatings that weren't formulated to hold up in a marine environment. Materials and fasteners that perform fine forty miles inland can show pitting, rust streaks, or premature coating failure on an island exposure like this one.
Driving Rain and Wind-Driven Moisture
Storms coming off the water don't just drop rain straight down — wind pushes it sideways, driving moisture into seams, laps, and penetrations that would stay dry in a calmer setting. Siding systems rely on overlapping layers and a drainage path behind the cladding to manage this. When that drainage plane is installed poorly, or corners are cut on flashing at windows and doors, wind-driven rain finds its way behind the siding and into the wall assembly, where it can sit unnoticed for months.
The Long Moss Season
Western Washington's damp, shaded conditions already favor moss and algae growth, and a marine-influenced site like Lummi Island extends that season further than most of Whatcom County. Moss holds moisture against a surface, feeds on organic material in some coatings and substrates, and can work into small gaps and joints over time. Siding material, coating quality, and installation detailing all affect how much of a foothold moss gets and how easily a homeowner can keep it in check.
What a Correct Siding Installation Involves
None of the climate challenges above are solved by the siding material alone — they're solved by the whole assembly working together. A correct installation on a home like this covers several layers, not just the visible board.
Weather-Resistive Barrier and Flashing
A continuous weather-resistive barrier goes on before the siding, and every penetration — windows, doors, vents, hose bibs — gets flashed so water sheds outward instead of tracking behind the barrier. This is the layer that does the real work of keeping wind-driven rain out of the wall cavity, and it's also the layer that's invisible once the job is finished, which is exactly why it needs to be done right the first time.
Rainscreen Ventilation
A small air gap between the weather-resistive barrier and the back of the siding — created with vertical furring strips — lets any moisture that does get past the outer layer drain and dry out instead of staying trapped against the sheathing. On a site with this much sustained moisture exposure, that drainage gap is one of the details that separates a siding job built to last from one that looks fine for a few years and then doesn't.
Fastening, Trim, and Caulking
Fastener type, spacing, and placement all affect how the siding performs over time, especially with a fiber cement product where manufacturer fastening specs exist for a reason. Trim boards, corners, and butt joints need to be detailed so water is directed off the wall rather than collected at a seam. Caulking has a role at specific transitions, but it's a supplement to good flashing and shingling technique, not a substitute for it — caulk alone will not keep a marine-exposed wall dry for the life of the siding.
Why We Install Only James Hardie Fiber Cement
We install one siding product: James Hardie fiber cement. That's not a marketing preference — it's a decision built around what holds up in a marine, high-moisture climate like this one, and what doesn't. Fiber cement is non-combustible, dimensionally stable, and doesn't absorb and swell with moisture the way some wood-based products can. James Hardie also engineers specific product lines for different climate zones through its HardieZone system, with wetter regions like coastal Whatcom County served by formulations built for higher moisture exposure rather than a one-size-fits-all product.
Other materials have real advantages in the right setting, and we're honest about that rather than pretending otherwise:
| Material | Where it's strong | Trade-off in a marine, moss-heavy climate |
|---|---|---|
| Vinyl siding | Low upfront cost, low maintenance in mild climates | Can warp or become brittle with temperature swings; seams and moisture management depend heavily on installation quality; limited resistance to sustained wind-driven rain at laps |
| LP SmartSide (engineered wood) | Workable, budget-friendly wood-based option | Wood-strand core is more sensitive to sustained moisture exposure than fiber cement; edge sealing and maintenance become more critical near salt air and long wet seasons |
| Cedar siding | Traditional look, natural material | Requires ongoing refinishing and moisture maintenance; more susceptible to moss, mildew, and rot in a persistently damp marine climate without diligent upkeep |
| James Hardie fiber cement | Non-combustible, dimensionally stable, factory-cured ColorPlus finish | Requires correct installation to specification — pays off in longevity but is less forgiving of shortcuts than more flexible materials |
The trade-off with Hardie is that it demands correct installation — proper fastening, clearances, and flashing — to deliver on its warranty and its lifespan. That's exactly why we don't treat installation as an afterthought to the material choice. The product and the process are one job, not two.
Our Process for a Lummi Island Job
Working on the island adds logistics that don't apply to a mainland Birch Bay job, and we plan around them rather than treating the ferry as a surprise on install day.
- Site assessment. We look at wall exposure, existing siding condition, water damage risk areas, and how much of the current wall assembly (sheathing, barrier, flashing) is salvageable versus needs replacement.
- Material and logistics planning. Because Lummi Island is reached by the county ferry, we plan crew schedules and material deliveries around ferry capacity so the job runs on a predictable timeline instead of losing days to logistics mid-project.
- Tear-off and inspection. Old siding comes off and the sheathing underneath gets inspected for hidden moisture damage before anything new goes up — this is often where problems from a prior installation surface.
- Weather barrier, flashing, and rainscreen installation. This is the layer that determines long-term performance, and it happens before a single piece of visible siding goes on.
- James Hardie installation to manufacturer spec. Fastening, clearances, and joint detailing follow James Hardie's published installation requirements, which is also what keeps the manufacturer's warranty intact.
- Trim, caulking, and final detailing. Transitions at windows, corners, and roof lines get finished so water sheds correctly at every joint.
- Walkthrough. We review the finished work with the homeowner before calling the job done.
What Drives Cost on a Lummi Island Siding Project
Every home is different, so we won't quote a number without seeing the job, but a few factors consistently affect cost on island projects specifically:
- Existing siding removal and disposal — tear-off complexity depends on what's currently on the wall and its condition
- Hidden sheathing or moisture damage — found after tear-off, this can add repair scope before new siding goes on
- Wall complexity — corners, dormers, and trim details take more labor than flat, simple elevations
- Logistics — ferry scheduling for crew and material delivery is a real planning factor for island jobs, not something we treat as free
- Siding profile and finish selection — lap width, texture, and ColorPlus color all factor into material cost
We walk through these specifics with every homeowner during the estimate so there are no surprises once work starts.
Why a Crew That Already Works This Island Matters
Island jobs punish inexperience in ways that don't show up on the mainland. A crew that hasn't planned around the ferry can lose a day mid-project waiting on materials. A crew unfamiliar with how exposed a given elevation actually is to wind-driven rain can under-detail flashing that looks fine on install day and fails two winters later. And when a warranty question comes up down the road, it matters whether the contractor who did the work is still reachable and still working in the area — not a crew that did one job here and moved on.
Working Lummi Island regularly means we already know how to sequence a job around ferry logistics, we've seen how salt air and moss behave on real homes here, and we're positioned to respond if a warranty or maintenance question comes up after the work is done.
Maintaining New Siding Through Moss Season
Correct installation is the foundation, but ongoing care extends the life of any siding in this climate. A periodic rinse-down to clear accumulated debris and moss spores, keeping gutters clear so overflow doesn't run down the wall face, and trimming back vegetation that shades and dampens wall sections all help keep moss from establishing. James Hardie's factory-applied ColorPlus finish is formulated to resist the fading and moisture issues that make field-painted siding more maintenance-intensive, but no exterior on this island is entirely maintenance-free — the goal is to minimize the burden, not eliminate it.
Signs Your Siding Installation Was Done Right
Whether you're evaluating our proposed work or checking a completed job, these are worth confirming:
- Weather-resistive barrier is continuous with no gaps or tears left unaddressed
- Every window, door, and penetration is properly flashed, not just caulked
- A rainscreen gap is present behind the siding, not siding fastened directly to the barrier
- Fastener type and spacing follow the manufacturer's published installation instructions
- Butt joints and corners are detailed to shed water outward, not collect it
- Clearance is maintained between the siding bottom edge and grade, decks, or roof lines
- You receive documentation of the manufacturer warranty tied to a proper installation
If you're planning a siding project on Lummi Island or elsewhere in the Birch Bay area, we're happy to walk your home, look at what the current siding is telling us, and put together a straightforward estimate. No pressure, no obligation — just a clear look at what your home actually needs.